PATIENT GUIDE
This section is intended for patients, to teach you how to take some photos of your feet that your provider will need for your visit. If you are a provider and need help administering the LA Angle test, you can find help here.
GETTING STARTED
Before we begin, you’ll need to make sure you have the means to both take photos and send these photos to an email address. We’ll also need a few household items, namely a quarter, some clear tape, and a magic marker.
The easiest way to both take and email photos is from a modern smartphone, such as an Android or an Apple iPhone. If you need help setting up your smartphone to send emails, you can see our section below, SETTING UP EMAIL.
MARKING YOUR FEET
Now we’re going to take your magic marker and draw some points at specific places on your feet, as pictured below. You’ll need to do this on both feet.
To make POINT 1, you’re going to draw a dot on the rounded ball like shape at the base of your big toe. You want this to be on the side as much as possible, in the middle of the “ball” shape.
To make POINT 2, draw a similar dot on the side of your heel, trying to keep it level with the one you made at your big toe.
To make POINT 3, first feel around the arch of your foot with your fingers, around where you can see Point 3 in the picture. You should feel a rounded, bony spot that stands out more than the rest right near the top of your arch, usually being about halfway down the distance from your ankle bone to the floor. Some people may feel multiple “bony spots” in this general area, but you’re looking for the one closest to the top of your arch, while still generally being below your ankle (not down the foot towards the toes). When you’ve found your spot, draw a dot on top of it.
To make POINT 4, simply draw a point on top of the ankle bone where it sticks out like a ball on the side of your leg. After repeating this process on your other foot, you’ll be done with your magic marker.
TAKING PHOTOS
Now that we’ve drawn our dots, we’re ready to start taking photos. While people can take these photos themselves, you can also ask someone else in your household to take these photos for you if you find that more comfortable.
First, place you foot as shown below and take a photos of it from the side. We recommend you use your smartphone camera’s “front facing” or “selfie” option so that you can see what you’re taking a photo of as you do it. Make sure that you’re not just gently setting your foot on the ground, but that you’re putting weight on the foot so it feels like it’s collapsing the same way it would if you were standing like normal.
The foot flat on the ground.
Next take a photo of the same foot after you raise your heel up as much as possible, as shown below.
The foot raised.
Finally, repeat this process for your other foot. You should now have four total photos.
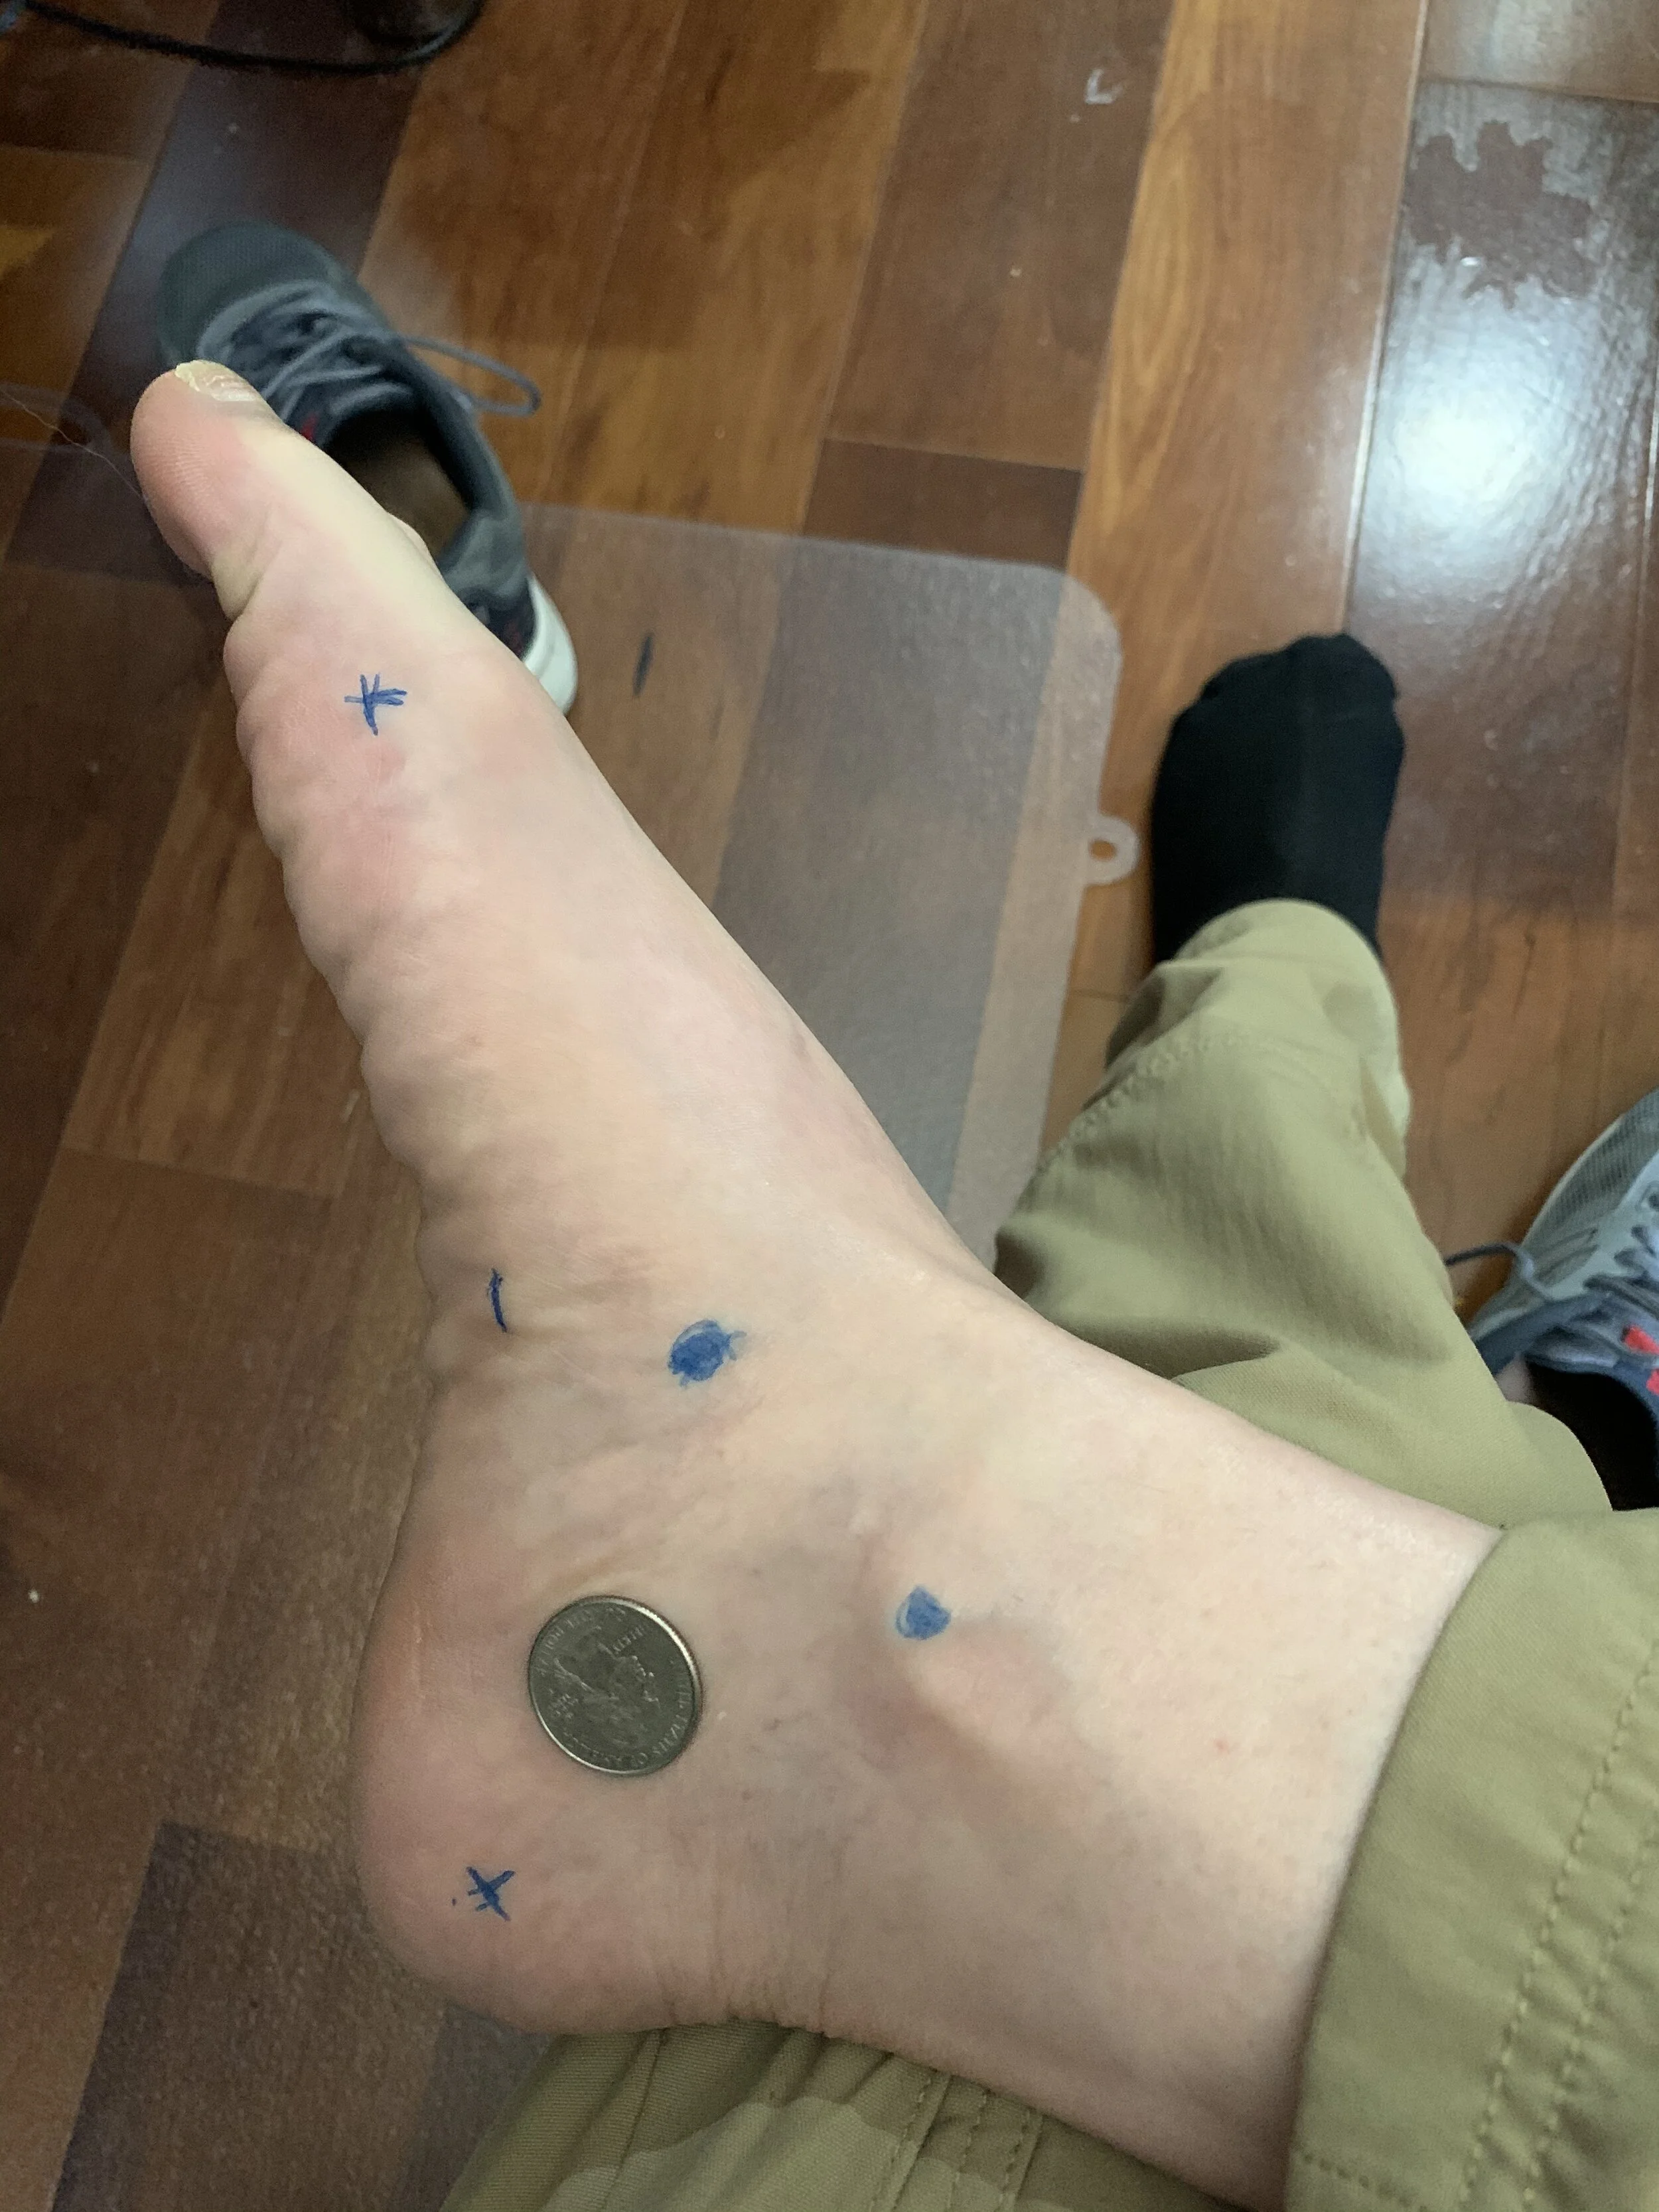
Pointed Foot Over Knee, With a Quarter
For the next three photos we’re going to be using our tape and quarter, so keep these objects handy.
The next two photos can be taken sitting down. Take one of your feet and cross it over your opposite knee. Tape your quarter onto the side of your foot somewhere near the arch, but not on top of it. Ideally you want the quarter to look like a circle in your photo instead of an oval, so you can move the quarter around if you need to achieve this.
While taking the photo, you’re going to point your foot down like a ballerina so that your foot makes an “arch” shape. While doing so, try and keep your big toe lined up with rest of the foot, instead of curling down.
It’s important that the photo isn’t taken so that you can see the bottom of the foot in it, instead being a photo taken just from the side. When you’re done, repeat the process for your other foot.
You should now have six total photos, and only one more to go.
The feet taken from above.
Finally, we take one more photo, which is just a shot of the feet from above, as pictured. Move your taped quarter to the top of one your feet. You should now have seven photos, and are done with this step.
SENDING PHOTOS
After this, you’re all ready to send your photos to your provider for review. They may have given you an email address to send them to, or may do so whenever you are seen.
SETTING UP EMAIL - iPHONE
If you own an Apple iPhone and do not currently have an email solution set up, you can get a free Google account installed by following the instructions in the following video.


